前一篇给窗体设置了Region,将窗体的FormBorderStyle设置成了None,然后修改了窗体的 显示区域Region。一个本来完好的窗体让我们设置成为了一个空白的没有任何色彩的窗体,这 对我们的界面开发好像是背到而行,有点南辕北辙了。其实不然,只有将窗体上的所有原有的 信息给去除掉,才能还原窗体的本来面貌,给窗体一个新面貌。
这篇就对窗体的界面开发设计一个新面貌。
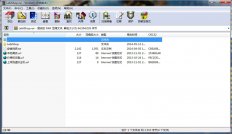
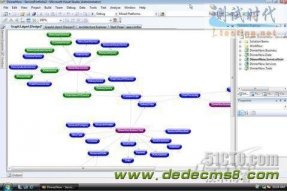
我在界面开篇的开篇就已经说过,界面开发其实就是修改窗体的两个区域,Client Area和 None Client Area,如下图:

而我们现在已经将窗体修改成了没有任何信息的窗体,如下图:

现在我们要做的,就是在这个什么都没有的图上添加上我们自己的界面,将窗体的Client Area和None Client Area从新绘制让其有新的面貌。而他的绘制确实需要很多的GDI+知识。
Client Area的绘画很简单,主要就是对窗体的背景色进行修改,这个对于C#开发人员就是 一句话的事情,设置窗体的背景色就可以了。代码如下:
this._parentForm.BackColor = this._engine.SkinColor.Back;
但是,对于None Client Area的绘画就比较麻烦,他不仅仅画的是颜色,还有窗体的标题栏 、最大化、最小化、关闭按钮、窗体图标和窗体的边框,接下来就是一一对窗体的进行绘画。
窗体的标题栏分为两大部分:窗体的图标和窗体的标题,绘画这些的第一步都是对窗体的绘 画区域的设置。找到绘画的区域,然后使用GDI+进行绘画,具体的过程就是这样,代码如下:
#region NcPaint

/// <summary>

/// NcPaint

/// </summary>

/// <param name="form"></param>

/// <returns></returns>

private bool NcPaint(SkinningForm form, SkinEngine engine)

{

// Declared Filed

bool result = true;

IntPtr hdc = (IntPtr)0;

Graphics g = null;

Region region = null;

IntPtr hrgn = (IntPtr)0;

try

{

// Get Rect

RECT rectScreen = new RECT();

NativeMethod.GetWindowRect(_parentForm.Handle, ref  rectScreen);

Rectangle rectBounds = rectScreen.ToRectangle();

rectBounds.Offset(-rectBounds.X, -rectBounds.Y);

// prepare clipping

Rectangle rectClip = rectBounds;

region = new Region(rectClip);

rectClip.Inflate(-engine.SkinAppearance.BorderWidth, - engine.SkinAppearance.BorderWidth);

rectClip.Y += engine.SkinAppearance.CaptionHeight;

rectClip.Height -= engine.SkinAppearance.CaptionHeight;

// create graphics handle

hdc = NativeMethod.GetDCEx(_parentForm.Handle, (IntPtr)0,

(DCXFlags.DCX_CACHE | DCXFlags.DCX_CLIPSIBLINGS |  DCXFlags.DCX_WINDOW));

g = Graphics.FromHdc(hdc);

// Apply clipping

region.Exclude(rectClip);

hrgn = region.GetHrgn(g);

NativeMethod.SelectClipRgn(hdc, hrgn);

if (_bufferGraphics == null || _currentCacheSize !=  rectBounds.Size)

{

if (_bufferGraphics != null)

_bufferGraphics.Dispose();

_bufferGraphics = _bufferContext.Allocate(g, new  Rectangle(0, 0,

rectBounds.Width,  rectBounds.Height));

_currentCacheSize = rectBounds.Size;

}

// Get Caption Bounds

Rectangle captionBounds = rectBounds;

captionBounds.Height = this._engine.SkinAppearance.BorderWidth  + this._engine.SkinAppearance.CaptionHeight;

// Draw Caption

engine.SkinAppearance.DrawCaptionBackground(g, captionBounds,  this._formIsActive, this._engine);

// Draw Caption Icon

if (this._parentForm.ShowIcon &&  this._parentForm.Icon != null)

{

DrawIcon(g);

}

// Draw Caption Text

DrawCaptionText(g, this._parentForm.Text,  this._parentForm.Font);

// Draw Caption Button

DrawCaptionControlBox(g);

// Draw Border

engine.SkinAppearance.DrawBorder(g, rectBounds, engine);

}

catch

{

result = false;

}

// cleanup data

if (hdc != (IntPtr)0)

{

NativeMethod.SelectClipRgn(hdc, (IntPtr)0);

NativeMethod.ReleaseDC(_parentForm.Handle, hdc);

}

if (region != null && hrgn != (IntPtr)0)

region.ReleaseHrgn(hrgn);

if (region != null)

region.Dispose();

if (g != null)

g.Dispose();

return result;

}

#endregion
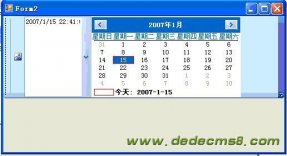
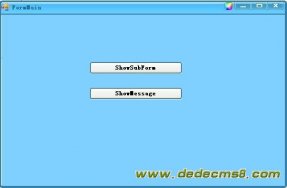
这个就完全绘制了窗体的边框。界面效果如下: